Tenant workgroups
Workgroups are used to control users' access to functions and configuration settings in the tenant (most of these functions are application-specific while a few are common to all of the Planning Space applications).
You can add or remove user accounts from membership of a workgroup using the Workgroups interface.
The effects of belonging to a workgroup are determined by the roles that a workgroup is allowed to use. These role permissions are set in the Tenant roles management interface.
Three workgroups are created by default for a new tenant:
- Administrators: this workgroup has access to all functions and all configuration settings for the tenant. By default, only Administrators can create or manage the user accounts, workgroups and roles of the tenant (but these roles can also be assigned to new workgroups). An initial administrator user with login ID 'Administrator' and password 'Administrator' is always created when a new tenant is created, and this is the only initial means for tenant administration
- Everyone: all users are automatically members of this workgroup. By modifying the roles which Everyone is assigned to, you can control which features of the Planning Space applications are made 'public' and available to all users.
- SecurityAdministrators: this workgroup is granted the role 'Security/Security'. By default it does not have any user members. (The workgroup name can be modified.)
To access workgroup management for a tenant, you need to login as a tenant administrator user and launch any one of the Planning Space client applications. Click 'Workgroups' in the client Navigation pane, or 'Workgroups' in the Security workspace top menu.

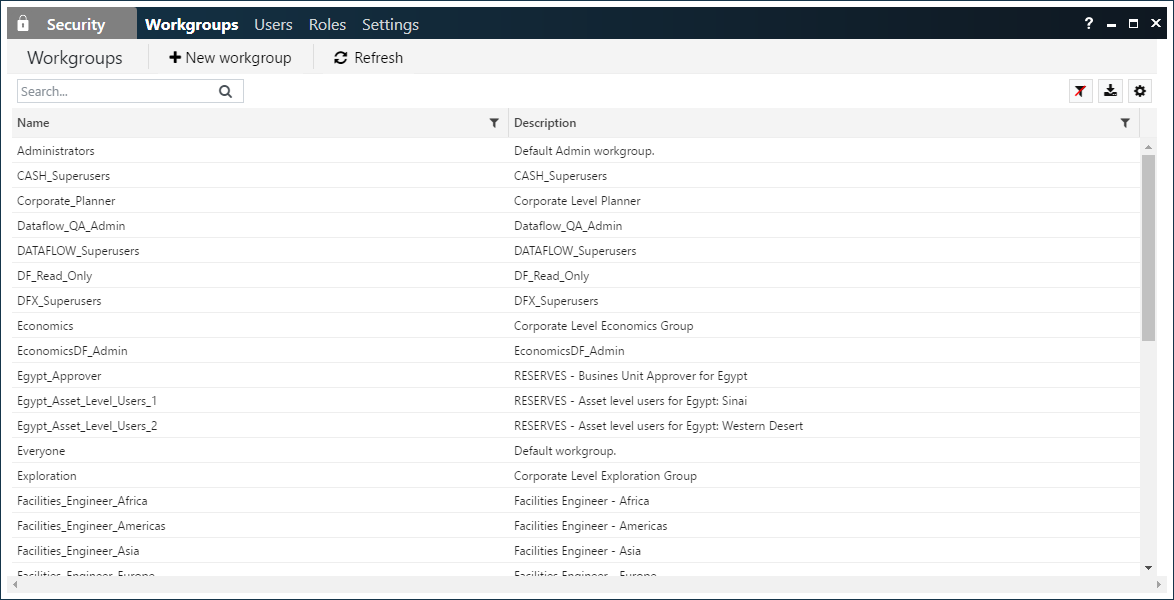
You will see the names and descriptions of the existing workgroups for the tenant.
For version 16.5 Update 13 and later: Workgroup names can be changed at any time, using the edit pane (except for 'Administrators' and 'Everyone').
In earlier software versions, workgroup names cannot be changed after creation.
Create a new workgroup
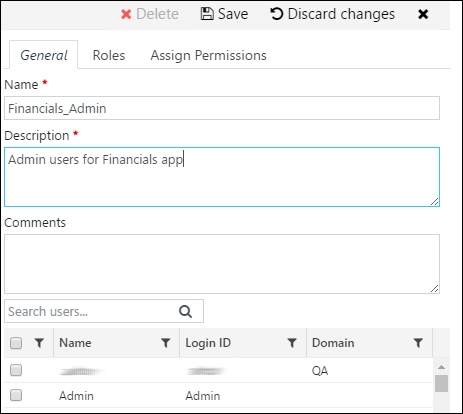
Click the 'New workgroup' button to create a new workgroup:

In the edit pane, type in a name, a short description, and an optional comment. Workgroup names can only contain alphanumeric characters, underscores (no spaces), and full stops; names can be up to 128 characters and must start with a letter.
Workgroup members: Use the tick boxes next to the user account names to set the initial user membership of the workgroup.
Click the 'Save' button to create the new workgroup.
For version 16.5 Update 12 and later: you can make a new workgroup as a copy of an existing workgroup by selecting one workgroup and clicking the Copy workgroup button.
'External Group' setting
Only for version 16.5 Update 12 and later: The External Group field is used in the configuration of automatic provisioning of tenant user accounts. See Automatic provisioning of tenant user accounts.
'License Profile Workgroup' setting
Only for version 16.5 Update 16 and later: The License Profile Workgroup checkbox is used to mark a workgroup for use with License Profiles (which can be used to control and prioritize users' access to Planning Space product licenses). See License profiles for details.
Edit a workgroup
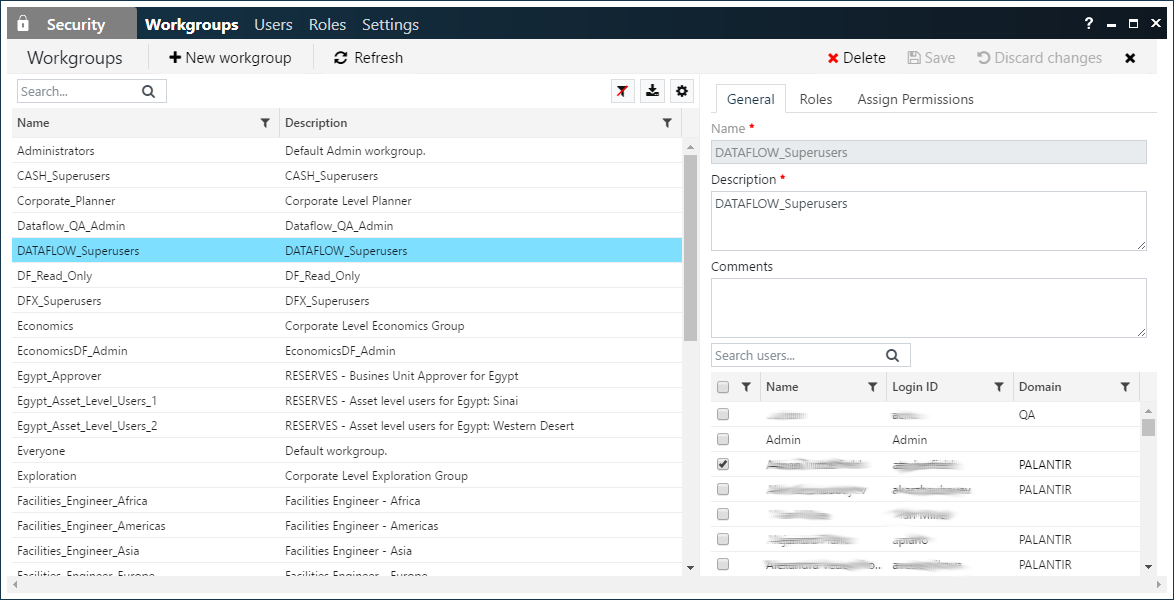
To edit the settings for an existing workgroup, click a workgroup name to open its edit pane. For example:

The workgroup that is being edited will be highlighted in blue. Click the 'X' button at the top right corner to close the edit pane.
There are two control buttons, which become activated when you have made an edit. Click the 'Save' button to save the changes that you have made. Click the 'Discard changes' button to undo any unsaved changes.
'General' tab: Use the tick boxes next to the user account names to add or remove user members of the workgroup. You can also edit the Description.
'Roles' tab: Modify which roles this workgroup is allowed or denied (see Tenant roles).
User membership editing
Only for version 16.5 Update 12 and later: The
Invert Selections button
 performs an inversion between selected and unselected users
(this is useful, for example, in the case of switching Dataflow document permissions between a specified list of allowed users
and a list of denied users).
Note for these software versions the user membership is displayed in a separate Users tab.
The Copy from workgroup... button can be used to set user membership based on the settings in other workgroups. Clicking the button opens a panel showing a list of workgroups (use the Search field to filter workgroups by name sub-string matching). Select one or more workgroups; a list of user accounts will appear. The dropdown selector switches between All selected workgroups (logical AND), which means that users will only be selected when they are members of all of the selected workgroups, and Any selected workgroups (logical OR), which means that users will be selected when they are a member of one or more of the selected workgroups.
Assign entity-level permissions for a workgroup
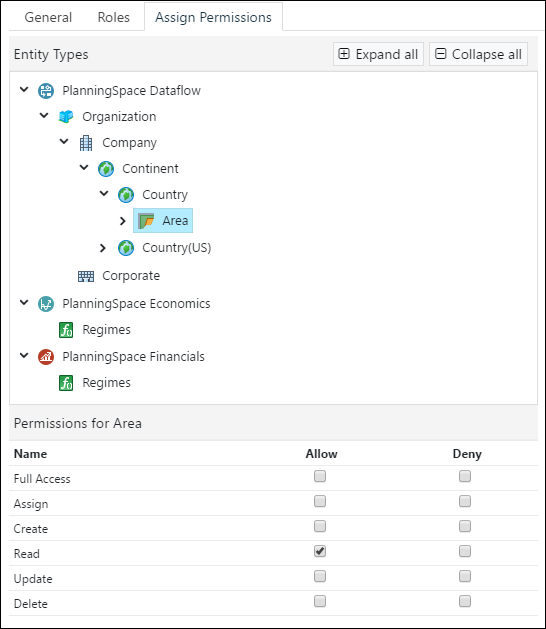
It is possible to edit the entity-level permissions for hierachies (Dataflow) and regimes (Economics and Financials).
Click a workgroup name to open its edit pane, and click the 'Assign Permissions' tab:

See Access permissions (entity-level) for hierarchies and regimes for explanation of the entity-level permissions.
Delete a workgroup
To delete a workgroup: click a workgroup name and click the 'Delete' button
 .
.
Then click 'Delete' in the confirmation dialog.
'Export as CSV' workgroup data
Click the 'Export as CSV' button to export a file that contains the details of all of the workgroups, and their Allowed and Denied roles.
Note for version 16.5 Update 7 and later the role names are prepended by the application name (e.g., 'PlanningSpace Dataflow-Dashboard Map'). For earlier versions role names are not prepended and can be ambiguous when the same role name is used for different applications.
